
About:
Robo Rally is a board game where you program your robot with your hand of cards, and race other players’ robots to finish the course first.
I used to play on GameTableOnline, but they closed down. I’m currently playing on Tabletop Simulator. I recommend DRaine’s Robo Rally 2016 rendition of the new version of the game.
– – – – –
My new tutorial is on using Tiled Map Editor to create boards. I have created a couple of tilesets from scans of the 2016 version of the game.
Step 1: download and install Tiled
Step 2: download and upzip my tilesets
UPDATE:
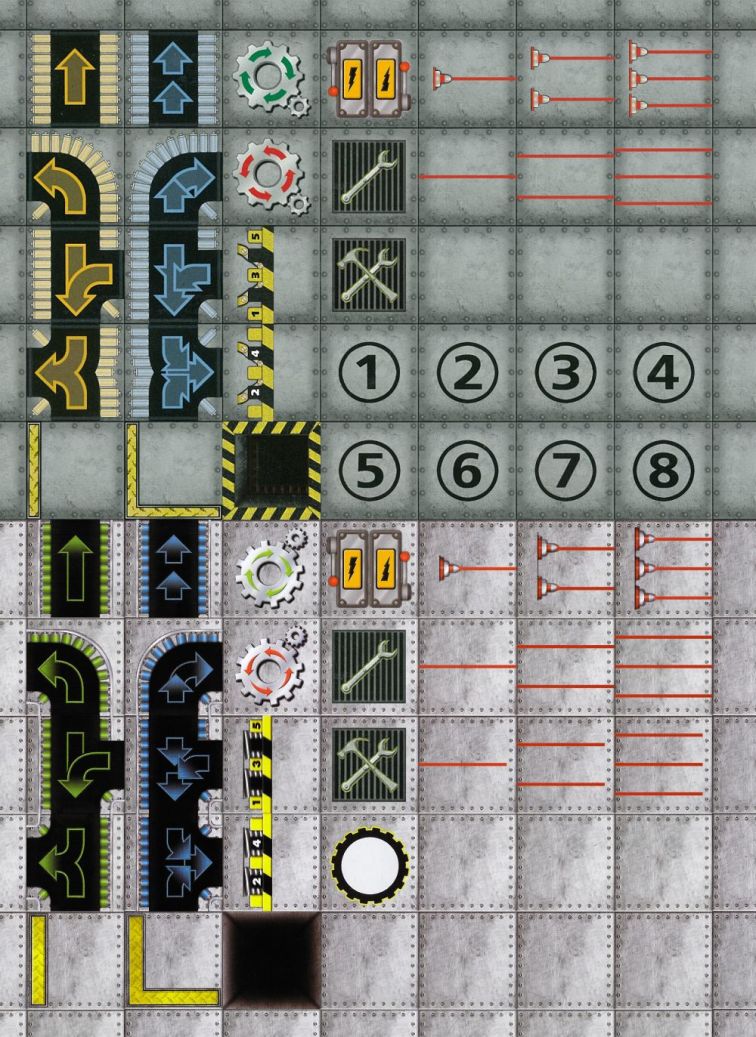
I’ve taken the old repair squares out of the 2016 set. Instead I’ve put a second charge station with green handles – this way you can play with the old rules on the new tileset with red charge stations as repairs and green as repair and upgrade points.
I added to the 2016 sets some very short laser sections, and some pushers that are set back – these are for when there would be a tiny gap between the end of a laser on one tile and the wall on the next, or where a pusher is set back against a wall in the adjacent tile.
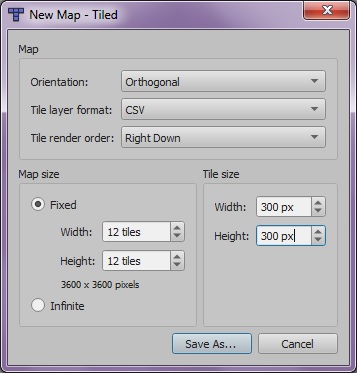
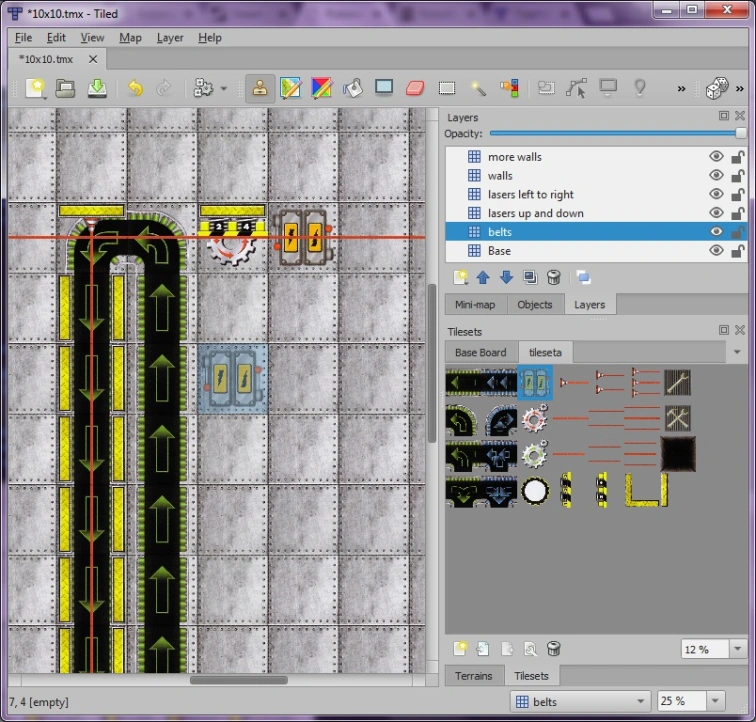
Run Tiled. The first thing to do is create a “New Map”. Choose “Orthogonal” orientation. The map size should be Fixed, and using 10 tiles for the 2016 version of Robo Rally or 12 for the Classic. Tile size should be 300px by 300px.
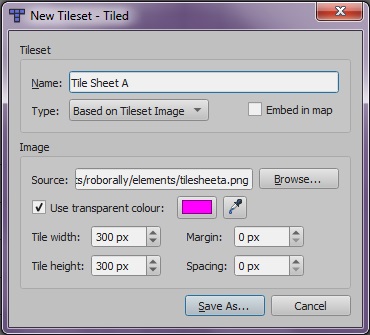
Create new tilesets. Go to File > New > New Tileset. Click on “Browse” to select one of the tilesets you downloaded. Make sure “Use transparent colour” is ticked, and set it to magenta (Red 255, Green 0, Blue 255). Tile width and height should be 300 px. Margin and spacing should be 0px. Type should be “Based on Tileset Image”. Leave “Embed in map” un-ticked to create a re-usable tileset file. Name it whatever you want. Do this for each tileset.
Making a board. The bottom-right pane should show you the Tilesets you added. CTRL+Scrollwheel will let you zoom in and out in this pane. If you go to the “2016Board” tileset, you’ll find you can drag the mouse to select the block of 12 tiles. Move them on to your map to place them with the stamp tool. Fill up the whole map with the backing board.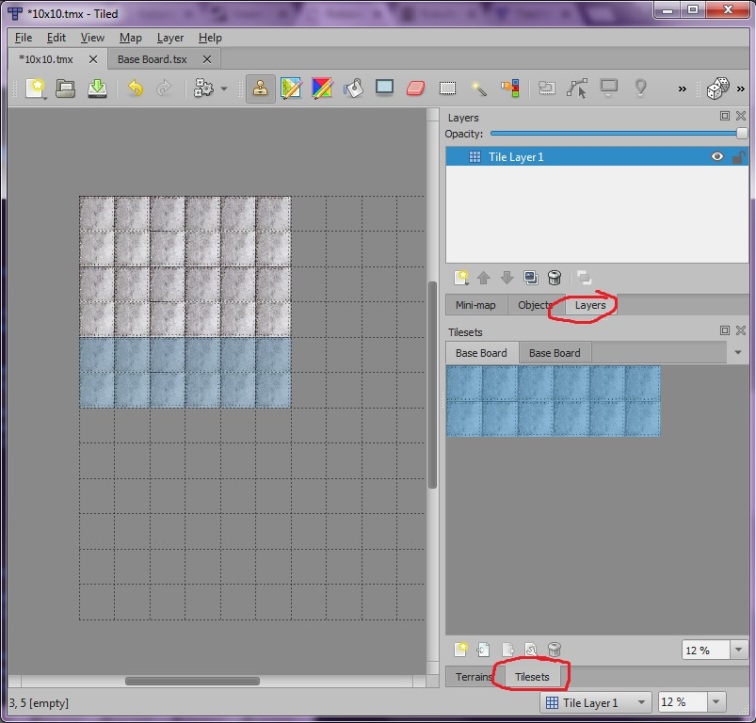
Layers. You’ll see your other tilesets in the same pane – click the tabs at the top of the pane to switch between them. If you go to Tileset A, you’ll see all the main board components. Before you start stamping these on to the map, you’ll need to make another layer. Layers should be the top-right pane. Click the New Layer button at the bottom left of the Layers pane. It looks like a shiny new piece of paper. Select “Tile Layer”. Now you can go about stamping board elements onto your map without destroying the base layer. I recommend using several layers:
- the bottom layer for the factory floor
- the next layer for conveyor belts, spinners, pits, repairs/recharges
- Lasers and pushers
- A second layer for lasers, if they will be crossing over each other
- A layer for walls
- Possibly a second layer for walls
You can double-click the layers to name them helpful names. You can also re-order layers by dragging or using the arrow icons.
Manipulating tiles. You can rotate tiles with the Z key, and flip them with the X key – you’ll want to flip the curved conveyors to get them curving the other way. You should be able to make most things you want with Tileset A.
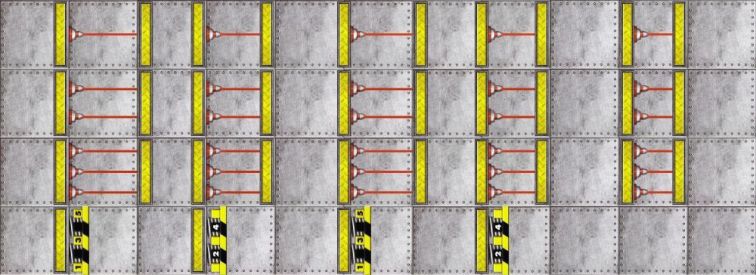
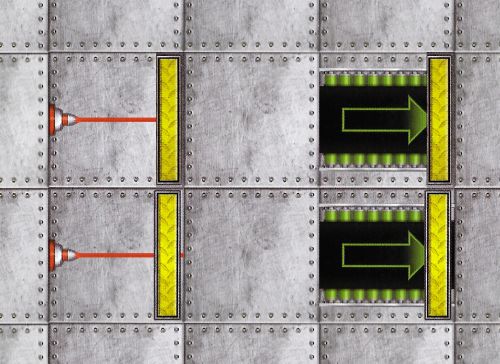
2016 Tileset – Walls and Lasers: You’ll notice that there is an extra row of laser beams. The bottom row is slightly shorter for meeting a wall. This is because the walls are slightly in from the edge of the tile in this tileset – if you use a full-length beam it will stick out the other side..
Tileset B. Tileset B is for some of the elements that just don’t sit quite where you want them. There is a wall that sits on the seam between tiles, it spans 2 squares. In the 2016 tileset there is also a wall with the back filled in, so lasers and conveyors don’t stick out under it. There are lasers and pushers that sit against a wall in the next tile, and against a wall on the seam. In the 2016 tileset there are short-beam versions of each of these, as well as a beam for sitting in a tile with two internal walls.
Pushers and Pits. There is a tileset full of pushers with only 1 number each, these exist for each wall position. There is a page devoted to pits for the 2005 tileset. This has all the components to make complex pit shapes, as well as prebuilt 1×2 pits with both orientations. You will need several layers for complex pits – the dark background goes on the bottom, probably 2-3 layers for the walls, depending on how wide your pit is, then 2-3 layers for corners on top.
Finishing. Save when you’re done. To output your map as an image, go to File > Export As Image…. Untick “Use current zoom level” in order to save it as maximum resolution. I recommend jpg for a smaller file size, or png if you want maximum detail.
So, that’s what I’ve been doing to create new maps. I don’t have great graphics skills, so I imagine that many people will be able to improve and expand these tilesets. But hopefully this is a helpful starting point. Now go and create things!
